Your container has arrived, but what if cargo is missing or swapped? Without proof, the financial loss is entirely yours. This checklist changes that, creating your evidence before it’s too late.
This pre-cut inspection is a 5-point forensic process. You must match the seal number to documents, check its physical integrity for tampering, verify unique markings, and photograph everything. This creates the evidence you need to place liability where it belongs—and it’s all done before cutting the seal.

I need to be very clear about something I've learned over 15 years in this business: Your job isn't to rush to "open the box." Your job, as the receiver, is to act like a forensic expert and carefully read the story that the seal is telling you. The moment you cut that seal without a thorough inspection, you have single-handedly destroyed the most critical piece of evidence. All the clues that could help you recover losses from theft or fraud are gone forever.
Why This Pre-Cut Inspection is Your First Line of Defense?
You assume a sealed container is a secure container. But a clever thief can make a tampered seal look legitimate, making you the one who gets blamed for the loss.
This inspection is your defense because it creates an undeniable record of the container's security status the moment it arrives at your facility. It is your legal and financial firewall, shifting liability away from you.

This isn't just a process; it's a strategic business defense. Every time a container changes hands—from the factory to the truck, to the port, onto the ship—a link is added to the chain of custody.
Your pre-cut inspection is the final, and most important, link in that chain. It's where you formally accept or reject the security of the shipment. Without this documented inspection, any claim you make for missing or damaged goods becomes your word against a dozen other parties. Insurers and freight forwarders are far more likely to honor a claim when it's backed by clear, time-stamped photographic evidence of a compromised seal before it was opened. This turns a potential argument into a simple, fact-based transaction. This is how you build a professional, defensible receiving operation.
Point 1: Matching the Seal Number Against Your Documents?
The numbers on the security seal and your paperwork look similar at a glance. But a single digit altered is the classic sign of a professional seal swap, and missing it makes the theft your problem.
You must meticulously compare the full alphanumeric serial number on the seal against your master document—the Bill of Lading (B/L) or manifest. Every single letter and number must be identical.

This isn't just a casual check; this is the foundational step of the entire inspection. Professional cargo thieves often use a tactic called a "seal swap." They'll cut the original seal, access the cargo, and replace it with a counterfeit seal that has a very similar, but not identical, number. They are counting on a rushed or lazy inspection at the destination.
The Document of Truth
Your Bill of Lading is the legally binding document that contains the "master" seal number. This is the number that was recorded when the container was officially sealed. Do not accept numbers from an email or a verbal confirmation; always refer to the official shipping document.
A Zero-Tolerance Policy
There is no such thing as a "close enough" match. If the B/L says "PS 1234567" and the seal says "PS 1234568," it is not your container's seal. It is a major red flag. In this situation, you do not cut the seal. You stop, photograph the discrepancy, and immediately contact the shipper or freight carrier.
Point 2: The Physical Integrity Check for Tamper Evidence?
The number matches perfectly, so you're good to go, right? No. Sophisticated tampering, like gluing or shimming, can defeat a seal without altering its number at all.
This requires a hands-on physical check. Firmly grip both the pin and the barrel of the bolt seal. Attempt to pull them apart, twist them, and spin them. A securely locked seal will feel like a single, solid piece of steel.

This is where you detect the more subtle forms of tampering. You need to use your sense of touch and sight to find clues that a camera might miss.
The Critical "Spin Test"
For high-security bolt seals, this is crucial. When properly locked, the pin and barrel engage with an internal locking ring, and they should not spin independently of each other. If you can hold the barrel and freely spin the pin, the internal mechanism has been defeated or was never properly engaged.
Look for Telltale Tool Marks and Blemishes
Inspect the area where the pin enters the barrel. Look for fine scratches, evidence of glue, or paint that doesn't quite match the rest of the seal. Criminals use various methods—from super-cooling and shattering the pin to re-glueing it, to cutting and welding the shaft—and they almost always leave subtle traces behind.
| Sign of Tampering | What It Could Mean |
|---|---|
| Pin spins freely in barrel | Internal locking mechanism is broken or compromised. |
| Scratches around the pin | Attempted shimming or forcing with tools. |
| Discoloration or gluey residue | Heat/cold attack or a re-gluing attempt. |
| Mismatched color/texture | A sign that the seal has been repainted to hide welding. |
Point 3 & 4: Verifying Unique Markings and Locking Mechanism?
A thief can buy a blank seal online and engrave a matching number. If you only rely on the number, you are still vulnerable to a high-quality counterfeit.
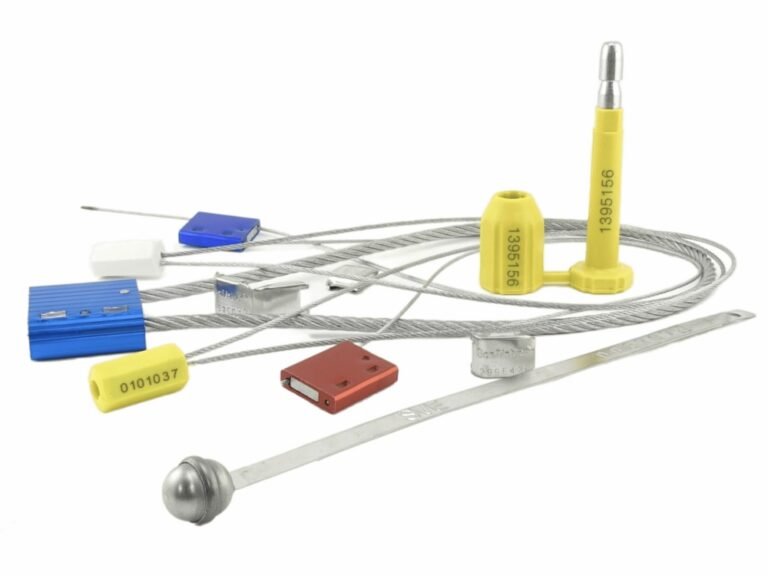
Look beyond the number. Verify your custom logo, barcode, or specific brand color. These unique identifiers turn a generic seal into a specific security key that is much harder to duplicate.
![]()
This is why, as a supplier, I always stress the importance of customization. It’s not a vanity feature; it’s a powerful layer of security.
Point 3: Unique Markings Are Your Fingerprint
A generic bolt seal is a commodity. A bolt seal with your company's laser-engraved logo, a unique QR code, or in your specific PMS color is not. A criminal would have to invest significant time and money to replicate these features, making your cargo a much less attractive target. Check that the logo is crisp and correct, not a blurry or cheap imitation.
Point 4: Confirming the Seal Type
This is a quick but important sanity check. If your company policy dictates that all high-value shipments must use a high-security, C-TPAT compliant bolt seal, you need to verify that is what is on the container. Sometimes, a thief will replace a high-security seal with a visually similar but much weaker plastic or fixed-length seal. Confirming you have the correct type of security device is a fundamental step.
Point 5: Documenting Everything with a Camera Before You Cut?
You've found a discrepancy—a mismatched number or a spinning pin. But now you have a major problem: without proof, it's just your word against the carrier's.
A photograph is your undeniable proof. Before cutting any seal, take clear, well-lit photos. The ideal evidence package includes a wide shot of the container doors showing the seal in place, and a close-up that clearly shows the seal number and any signs of tampering.

This final step is what turns your inspection into a powerful legal and financial tool. A digital photograph contains metadata (like the date and time) that makes it credible evidence.
What to Photograph
- The Wide Shot: Capture the entire back of the container, showing the seal on the locked doors. This proves the seal was documented on-site and in situ.
- The Close-Up: This is the most important photo. The seal number must be crystal clear and legible. Make sure there is no glare and the image is in sharp focus. If you suspect tampering (like scratches or glue), take additional macro shots of the problem area.
- The Discrepancy Shot: If the seal number does not match the B/L, take a photo of the seal next to the document to clearly show the mismatch.
This simple, 30-second photographic routine provides the indisputable evidence needed for any potential claims process. It is the action that solidifies your financial firewall.
Conclusion
Stop treating a container seal like a lock to be broken. Treat it as a final report to be read. This 5-point inspection is your professional protocol to secure evidence and protect your business.
Build Your Financial Firewall with ProtegoSeal
Your security program is only as strong as your inspection process. At ProtegoSeal, we provide uniquely marked, high-security seals designed to make tampering obvious and your inspections effective. Contact us to create a seal that's not just a lock, but a true evidence recorder.