An employee grabs the wrong tool, the cable frays, and a sharp wire springs back, causing a nasty cut. The seal is mangled, not cut, and the removal process is now an undocumented safety incident.
Removing a high-security cable seal requires a precise process, not just brute force. To do it safely, you must use a dedicated cable cutter, wear safety glasses, and follow a strict protocol for inspection, cutting, and disposal.

I've seen many people treat the removal of a cable seal as an afterthought. They see it as a simple act of destruction. But this view is a mistake. Correctly removing a high-security cable seal is a technical job that requires precise tools and a standard process. Every step has a purpose: to guarantee the operator's safety and to provide a perfect, documented end to that shipment's security journey. Let's walk through that professional process step-by-step.
Why Must You Perform a Pre-Removal Inspection of the Cable Seal?
The truck arrives, and your team is in a hurry to unload. They cut the seal immediately, only to later discover that the seal's number doesn't match the manifest, creating an irreversible gap in the audit trail.
A pre-removal inspection is your last chance to verify the seal's integrity before the chain of custody is broken. This step confirms the seal number matches the documentation and ensures it hasn't been tampered with during transit.
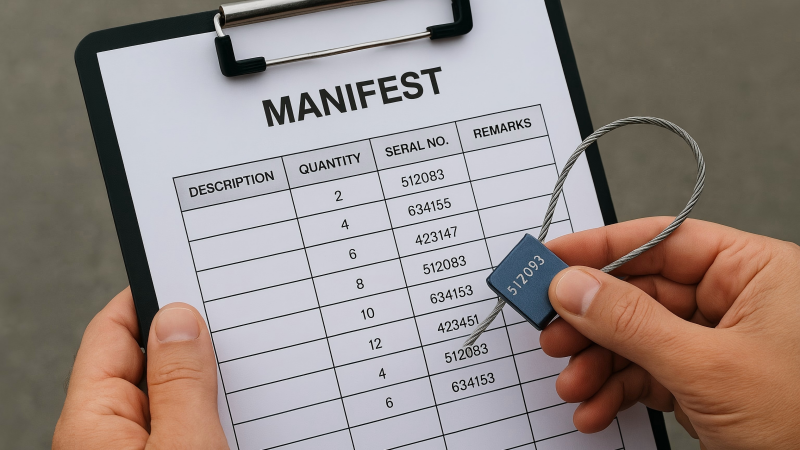
This first step is perhaps the most critical from a documentation standpoint. Breaking the seal is an irreversible action. Once it's cut, you can no longer prove its state upon arrival. In my experience, facilities with strong security protocols treat this like a formal evidence-handling procedure.
The Three-Point Check
Before you reach for any tool, you must conduct this check:
- Number Verification: Read the serial number on the seal's body. Does it exactly match the number listed on the bill of lading or shipping manifest? If it doesn't, STOP. Do not cut the seal. This is a security discrepancy that must be reported immediately.
- Cable Inspection: Run your fingers along the cable (with gloves on). Are there any signs of fraying, cutting, or gluing? The cable should be smooth and uniform.
- Locking Body Check: Examine the seal's body. Are there any cracks, signs of superglue, or scratches around the cable entry point? This could indicate a sophisticated tampering attempt.
This inspection is your final "trust, but verify" moment.
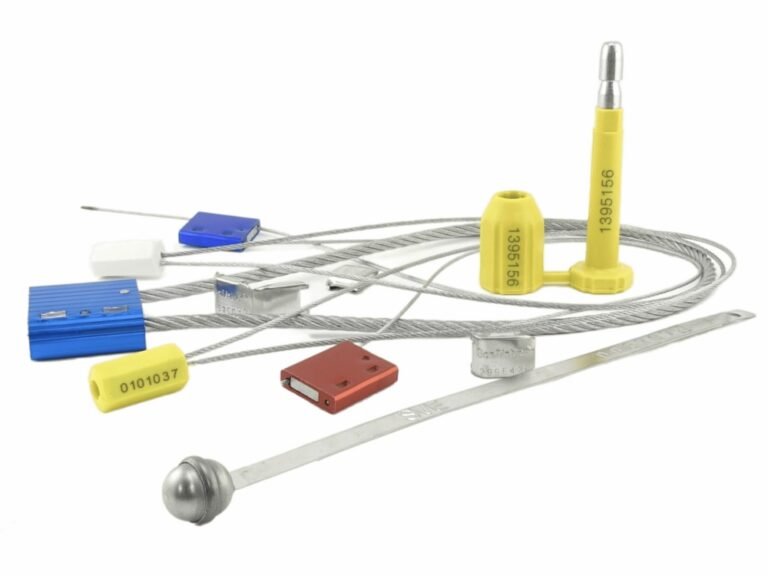
What Are the Essential Tools for Cutting a High-Security Cable Seal?
An employee tries to use a pair of flimsy wire snips on a hardened steel cable. The tool's jaws are ruined, the seal is barely scratched, and a simple task has now become a frustrating and time-wasting problem.
The only acceptable tool for cutting a high-security cable seal is a dedicated cable cutter. Its hooked, hardened steel jaws are specifically designed to trap and sever multi-strand steel cable cleanly and safely.

High-security cable seals are made from aircraft-grade steel cable for a reason—to resist simple cutting tools. Using the wrong tool is not just inefficient; it's dangerous.
Why Other Tools Fail
- Bolt Cutters: While great for bolt seals, their flat jaws can crush and mash a cable, often failing to cut all the strands and creating a splayed, hazardous mess.
- Pliers/Wire Cutters: Standard pliers lack the leverage and jaw hardness. They will be permanently damaged by the hardened steel cable, often without even denting it.
- Hacksaws: A hacksaw is designed for softer metals and relies on friction. It is incredibly slow and will barely scratch the surface of a high-security cable.
What to Look for in a Cable Cutter
A proper cable cutter is a specialized tool. It features curved, bypass-style blades that wrap around the cable. This design concentrates all the cutting force and prevents the strands from splaying out. For most cable seals (up to 5.0mm), a 24-inch (600mm) cutter provides the necessary leverage for a safe, easy cut.
What Is the Correct Cutting Technique for High-Security Cable Seals?
The worker positions the cutter at the very tip of its blades and squeezes. The cable slips out, and the inefficient cut sends a jolt through their arms, risking a strain injury.
The correct technique involves placing the cable deep in the cutter's jaws, ensuring a stable stance, and applying a smooth, single stroke. This approach maximizes leverage, ensures a clean cut, and minimizes physical strain on the operator.

The right tool is only half the battle; using it correctly is essential for safety and efficiency. After years of watching this process, I can tell you the professional method is simple and repeatable.
- Grip the Seal: With one hand, hold the body of the cable seal firmly. This prevents it from moving or twisting during the cut.
- Position the Cutter: Open the cable cutter's jaws and place the cable as deep as possible into the "throat" of the tool. Cutting with the tips is a common mistake that drastically reduces leverage.
- Find the Sweet Spot: Position the cutter on a straight section of the cable, away from the locking body and the loop end. This ensures a clean cut without interference.
- Make a Single, Clean Cut: Apply steady, deliberate pressure to the handles. A quality cutter, properly positioned, should sever the cable in a single, smooth motion. Do not use a rocking or jerking motion. The goal is one clean "snap."
What Are the Critical Safety Measures When Removing a Cable Seal?
A worker leans in close to get a better look as they cut the seal. The cable, under tension, snaps and a small piece of metal flies off, striking them just below the eye.
The most critical safety measure is wearing proper Personal Protective Equipment (PPE), specifically safety glasses. The cut ends of a steel cable can be unpredictable and are a significant projectile hazard.

Cutting a high-security cable seal is an act of releasing stored tension. That energy needs to go somewhere, and you must protect yourself from it. There are two non-negotiable safety rules.
Rule #1: Always Wear Eye Protection
The ends of the cut cable can spring apart with surprising force. A small fragment of steel or a frayed wire can be ejected at high speed. Wearing ANSI-rated safety glasses is mandatory. I have personally heard of incidents that could have been prevented by this simple, inexpensive piece of equipment. It is the most important safety step.
Rule #2: Control the Ends
When possible, use your non-dominant hand to hold both ends of the cable loop while you cut with your dominant hand. This helps contain the two pieces after the cut, preventing them from flying or falling unexpectedly. Wearing heavy-duty work gloves will protect your hands from the sharp, freshly cut edges. This level of control is a hallmark of a professional and safety-conscious operation.
What Is the Correct Post-Removal Protocol for a High-Security Cable Seal?
The cut seal is thrown into a general trash bin. Weeks later, an auditor asks to see the record of the seal for a specific shipment. There is no physical proof, and the digital record is now impossible to verify.
The cut seal is the final piece of evidence for a secure shipment. The correct protocol is to retain the seal with the corresponding shipping manifest for a set period, creating a complete and physically verifiable audit trail.

This is how you complete the "perfect, documented full stop." The life of the seal doesn't end when it's cut. It ends when its journey is fully documented.
- Contain the Pieces: Immediately place both pieces of the cut seal (the body and the cable end) into a small, clear plastic bag.
- Attach to Paperwork: Staple or securely clip this bag to the original bill of lading or manifest for that specific shipment.
- File and Retain: File this complete record according to your company's retention policy. Many logistics and freight companies hold these records for 60 to 90 days as a standard practice.
This simple action of retaining the physical seal transforms your paperwork from a simple claim into verifiable proof. In the event of a dispute or audit, being able to produce the actual seal is an incredibly powerful position to be in.
Conclusion
Removing a cable seal is the final, critical step in your security process. By treating it as a technical procedure—with proper inspection, tools, technique, and documentation—you ensure safety and complete the chain of custody with professionalism.
Complete Your Security Chain with ProtegoSeal
From the first click of a seal to its final, documented removal, every step matters. At ProtegoSeal, we provide high-security cable seals that give you confidence throughout your entire supply chain. Contact us to ensure every shipment has a secure beginning and a documented end.