You’ve found a suspicious seal on your container, but your insurance claim gets denied. Without undeniable proof, the massive financial loss for the missing cargo is all yours.
To secure an insurance claim, you must identify signs of tampering, test the seal's integrity, and document everything meticulously with photos and a detailed report. This process creates an unbroken chain of custody, turning your suspicion into hard evidence.

From the moment you suspect a seal is compromised, identification and documentation must be a single, continuous action. You have to imagine yourself as a forensic investigator "live-streaming" a crime scene. The container is your scene, and that small seal is the key physical evidence. From this point on, every action you take, every note you make, and every photo you capture could become critical material for insurers or even a court. Your one and only goal is to build a complete, undeniable chain of evidence. This guide shows you exactly how to do that.
A Forensic Guide to Visual Tamper Evidence?
The seal is on the container, so it looks secure, right? But professional thieves use subtle methods that a quick glance will always miss, leaving you with an empty container and no proof.
A forensic visual inspection means looking for things that are out of place. Scrutinize the seal for fine scratches, mismatched colors, glue residue, or abnormal textures that indicate it has been manipulated.

This is where you put on your investigator's hat. You are looking for the small mistakes the criminal made. I always advise teams to slow down and hunt for telltale signs that break a seal's "visual fingerprint."
Micro-Scratches and Tool Marks
Use a flashlight, even in daylight, and shine it across the surface of the seal, especially where the pin enters the locking barrel. Look for fine scratches or gouges. A factory-new seal is smooth. Scratches often mean tools were used to shim, pry, or twist the mechanism.
Paint and Plastic Anomalies
Many seals have a plastic coating over the steel. Is the color consistent? Are there any spots that look slightly duller or shinier? This can indicate it was super-heated or cooled and then covered up with new paint. Look for any trace of glue or epoxy, a classic sign of a "glue-up" job. A high-quality security seal is manufactured under controlled conditions; any variation you see was likely introduced post-manufacturing.
Physical Verification: Testing the Seal's Mechanical Integrity?
The seal looks fine and the numbers match, so you think you're safe. But the internal locking mechanism could be broken, allowing the seal to be opened and re-closed without a trace.
You must physically test the seal's integrity before cutting it. Firmly grip both the pin and the barrel and attempt to pull them apart and twist them. A secure seal should feel like a single, solid unit.

This is the most critical hands-on test. It separates well-made seals from counterfeits and detects a common method of tampering. Over the years, I've seen countless insurance claims fail because this simple test was skipped. If a seal passes the visual test but fails this physical test, you have a major red flag.
The All-Important "Spin Test"
This is non-negotiable for bolt seals compliant with ISO 17712. When a high-security bolt seal is properly locked, the pin engages with an internal C-ring or locking mechanism. This engagement prevents the pin and barrel from spinning independently. If you can hold the barrel and freely spin the pin with your fingers, the lock is compromised. It’s a near-certain sign of tampering.
The Pull Test
While a bolt seal is designed to withstand over a ton of pulling force, a simple, firm pull by hand is still a useful test. It can reveal a poorly executed re-gluing or a broken locking mechanism that has just enough friction to hold the seal together visually, but not physically.
Principles of Evidentiary Photography and Videography?
You found a spinning seal and told your boss, but the carrier denies it. Without time-stamped, objective proof, your discovery becomes a "he said, she said" argument you will lose.
Evidentiary photography must be clear, contextual, and comprehensive. You need to capture wide-angle shots to establish location and close-ups that make serial numbers and tamper signs undeniable.

Think of your phone's camera as your primary forensic tool. Following the principles of evidence documentation is crucial.
Go Beyond a Single Photo—Shoot Video
The best practice today is to record a single, continuous video.
- Start on the paperwork: First, film the Bill of Lading or manifest, clearly showing the declared seal number.
- Wide Shot: Without stopping the recording, walk to the container and capture a wide shot of the doors, showing the seal in place. This proves context.
- Close-Up: Move in for a clear, steady shot of the seal. Zoom in so the serial number is perfectly legible.
- Demonstrate Tampering: While still recording, perform the spin test or point out the visual scratch marks. Your video has now captured the discrepancy and the proof.
Key Photo Principles
If you can only take photos, follow this sequence:
- Photo 1 (Context): The entire container back, showing the seal.
- Photo 2 (Detail): A tight close-up of the seal, ensuring the number is in focus.
- Photo 3 (Evidence): A close-up of the specific tampering sign (scratches, glue).
- Photo 4 (Discrepancy): A shot of the seal next to the manifest if the numbers don't match.
Establishing an Unbroken Chain of Custody?
You have great photos, but who took them? And when? The other party can claim the photos were taken after the fact, making your evidence worthless in a dispute.
The chain of custody is a chronological log proving that your evidence was handled and documented correctly from the moment of discovery. The person who finds the tampering must be the one to start the documentation.

Your evidence is only as strong as its chain of custody. In all my training sessions, I emphasize that this is not just paperwork; it’s a legal concept that gives your evidence integrity.
Who, What, When, Where
The log must be started immediately by the person who discovered the issue. It needs to capture:
- Who: Full name and title of the person who found the issue and documented it.
- What: A description of the findings (e.g., "Seal number mismatch," "Pin spins freely").
- When: The exact date and time of discovery. Digital photos and videos have this metadata automatically embedded.
- Where: The specific location (e.g., "Loading Bay 4, Facility XYZ").
Witness Corroboration
If possible, have another person witness your inspection and sign the log. A second signature makes your report significantly stronger. It moves your claim from a single observation to a corroborated fact, which is much more difficult for an insurance company to dispute.
The Anatomy of a Comprehensive Incident Report?
Your notes and photos are disorganized. When the insurer asks for a formal report weeks later, you can't piece together a coherent story, and your claim is weakened or denied.
A comprehensive incident report consolidates all your findings into a single, professional document. It should be structured, factual, and include all photos, logs, and witness statements.

This report is the final product of your investigation. It’s what you will officially submit. It must be written with the assumption that someone with no prior knowledge of the situation will read it. Clarity and structure are everything.
Essential Sections of the Report
A strong report should be organized like this:
- Incident Summary: What happened, when, where, and who was involved. (e.g., "On May 20, 2024, at 14:30, Receiver John Doe discovered a tampered seal on Container #ABCU1234567 at Bay 4.")
- Shipment Details: Container number, Bill of Lading number, and the correct seal number from the manifest.
- Evidence Details: A description of the tampered seal (e.g., "Seal #PS7654321 found on container. Pin spins freely. See attached video.").
- Evidence Log: Attach or embed your photographic/video evidence. Reference them in the text (e.g., "See Photo 3 for close-up of tool marks.").
- Chain of Custody Log: Attach the signed log showing who handled the evidence.
- Signatures: Signatures of the person who discovered the issue and any witnesses.
Conclusion
Stop being a victim of cargo theft. By systematically identifying tampering and documenting it with an undeniable chain of evidence, you take control. This process turns a potential business loss into a solid, defensible insurance claim.
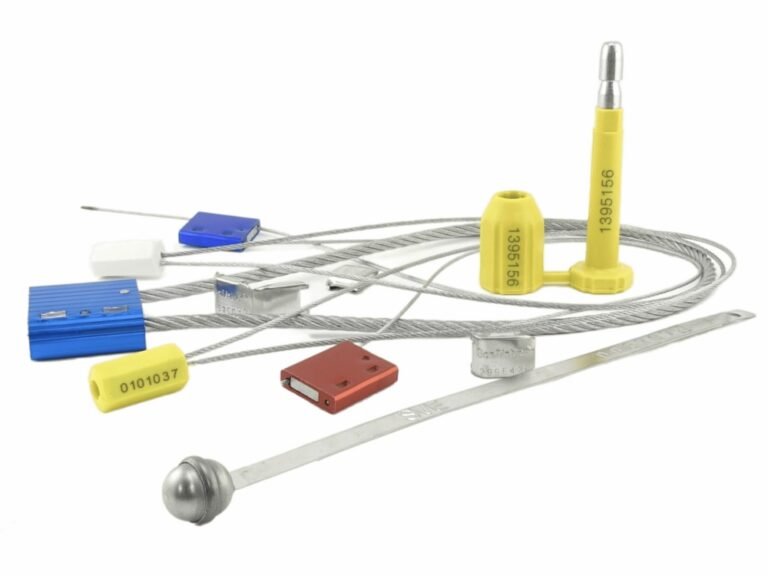
Build Your Defensible Evidence Chain with ProtegoSeal
A security strategy includes planning for its failure. At ProtegoSeal, we offer high-security seals with unique markings that make tampering easier to spot and document. Contact us to learn how our seals can be the first link in your unbreakable evidence chain.